Showing posts with label baking. Show all posts

Wednesday, February 11, 2015

Sourdough Bread {no knead, one rise}

Everyone calls me the "Sourdough Lady."
They like the food I make with sourdough. Particularly bread.
So I thought I might share with you my recipe. But I also have a friend who has been waiting for it.... for a while. Sorry. 

The best thing about this bread is that you don't have to spend countless minutes kneading it and making your arms feel like jello. Nor do you have to let it rise several times. You just mix it up the night before and bake it in the morning. 
Easy Peasey.
Sourdough Bread Recipe {no knead, one rise}
Makes two loaves.

Ingredients:

2 eggs
2 c. buttermilk, milk, or whey
2 c. sourdough starter
4-5 c. wheat flour
2 tsp. salt

  1. In a large bowl, whisk together eggs and milk. Add in sourdough and salt.
  2. Pour in flour, a little at time. Make sure it is thoroughly mixed in. I like to kinda, "fold" in the flour. Dough will be pretty liquid-y compared to usual bread dough consistencies.  
  3.  Transfer the dough equally to two, glass, oiled bread pans. Do not use metal! It never works, the bread just sticks to it and makes a big crumby mess.
  4.  Leave the pans in your oven over-night. I like to leave my oven light on. It gives off a little warmth, allowing the dough to rise more.
  5. In the morning, bake your bread at *350 for about 30 to 40 mins. or until brown and hollow sounding.
  6. Enjoy! with a slab of butter and a warm cup of tea or melted cheese and a tall glass of milk or... there are so many possibilities. Far too many to list. It can be used for anything, really.
           Eat fresh or store in a bread bag on the counter.
 I really just love how easy this is! And really, the possibilities are endless.
                             You could add cinnamon and raisins...
                                             Apples and nutmeg....
       You can make croutons when it gets stale....
Just play with it! Have fun!
I hope you liked this post. I'd love to hear what you've been baking!
 Now get going and make some bread!
Love,
Hagen  

Monday, January 26, 2015

Gluten Free Recipe// Lemon Poke Cake


I promised you the recipe, and here it is! Such a moist, lemony cake that's not too sweet. Plus, you don't have to worry about gluten intolerances. Believe me, even wheat-eaters will devour this cake!

For the cake, I was inspired by this recipe. Of course, I tweaked it a bit according to what I had on hand.

Lemon Poke Cake Recipe

6 eggs, room temperature
1/4 cup milk, almond milk, coconut milk or your choice of milk replacer
6 Tbls raw sugar or honey
1 tsp vanilla
1/4 cup coconut oil, melted
juice and zest of 1/2 lemon
1/2 tsp baking powder
1/2 tsp salt
1/2 cup coconut flour

1. Pre-heat oven to 350* and grease your pan.
2. Whisk together first four ingredients, making sure eggs are well incorporated.
3. Whisk in the coconut oil and lemon juice and zest.
4. In a separate bowl or measuring cup, sift together the last three ingredients.
5. Spoon batter into prepared pan, smooth top of batter if necessary.
6. Bake for 35-40 minutes.

While your cake is baking, you can prepare your lemon syrup and frosting.

Lemon Syrup
1/4 cup lemon juice
3 Tbls raw sugar or honey

1. Heat ingredients over low heat, just until sugar is dissolved. 
2. When cake is done baking, poke holes in it with a fork. 
3. Drizzle lemon syrup over and let cake cool.

Lemon Buttercream Frosting
1 1lb box Confectioner's Sugar
1/2 cup butter, softened
4 Tbls lemon juice
2 Tbls heavy cream, optional
lemon zest to garnish

1. Whip butter until fluffy.
2. Add sugar and lemon juice alternately.
3. Add in heavy cream if frosting is too thick for your liking.
4. Frost cake when cooled and garnish with zest if desired.


Viola! 
There you have a delicious cake for your next celebration! But heck, who says there has to be a special occasion for cake? Every day is a special occasion!
Love from,
Layla

Sunday, January 25, 2015

The Ghost of Christmas Past

Here we are with January almost over and we are only just now doing a Christmas post....
My, what a whirlwind it has been! But the wind has started to cease and the excitement of the Holidays has started to fade.


Layla, showing off the apron I made her...            ...and me, showing off the crocheted goods she made me.

Of course we can't forget about the food!
I must confess, I was too much of a pig to photograph the dinner, but I slowed down long enough to get a shot of Mama's Almond Pie. It was so scrumptious!

The best gift of all,of course, is The Gift. The Reason that we have Christmas at all...  

Looking back, it was quite a day, filled with joy and laughter and love! And naps...
Love,
Hagen

Thursday, May 1, 2014

Recipe// Tea-party Cookies

Hey there!
Our friend Sarah from All Things Vintage invited us to do a guest post. We shared a recipe for Gluten-Free Peanut Butter Oatmeal Cookies. They are a great treat for a tea-party, or any party for that matter!


If you are interested in this recipe, head on over to her blog! And don't forget to follow Sarah, she's AWESOME! But don't take our word for it, go see for yourself :)
Love from,
Layla & Hagen

Wednesday, April 30, 2014

Strawberry Anytime Tart {GF}


Mom has assigned me with the job to make breakfast every morning. It has been difficult for me to get creative, I just kinda make the same old things. Toast and eggs, muffins, pancakes, muffins....
But....
I have finally made something new, delicious and even low on sugar! Not to mention, it's Gluten-free! What's even better is it doesn't even have to be for breakfast, it's so good it's like having desert for breakfast! It could be really good for a little tea party or luncheon.

Strawberry Anytime Tart Recipe

What you need:

Strawberry filling
2 c. fresh strawberries, chopped
1/4 c. sugar
2 tbsp. water

1 tbsp. arrowroot
2 tbsp. water

Crust
1 1/4 c. almond flour
1 1/4 c. oat flour
1/4 c. sugar
1/2 tsp. cinnamon
1/2 tsp. salt
1 tsp. baking soda
5 tbsp. melted butter
2-3 tbsp. water

Serves: 8
  1. Preheat oven to 375* and oil a 9x13 baking pan.
  2. For the filling put the strawberries, sugar and water in a saucepan on medium heat. Bring to a boil and reduce heat. Simmer until strawberries are soft. Mash slightly.
  3. In a small bowl mix the arrowroot and water together. Pore into strawberry filling and stir thoroughly. Pore the combined strawberry filling into a bowl. Set to side and let cool.
  4. For the crust whisk all dry ingredients together in a medium sized bowl. Make a well, pore in the butter and water. Stir until well combined. The dough will be somewhat crumbly but still should come together in a ball.
  5. Press 2/3 of the dough firmly into your pan. I pressed it up on the sides just a tad, but that is optional. 
  6. Pore all of the strawberry filling over the crust, spread evenly.
  7. Crumble the remaining dough overfilling. You could do a little sprinkle of sugar as well.
  8. Slide in the oven and wait patiently for about 25 minutes or until crust is light brown and filling is bubbly. 
  9. Let cool until the crust comes away from the sides of the pan. Cut into 8 squares.
  10. Serve with a dollop of whipped cream and finally, EAT!


I found this recipe here but as always, made it my own with what I had...
This is a pretty flexible recipe. I used frozen strawberries once and would suggest that if you choose to also, that you add only 1-2 TSP. of water instead of 2 TBSP. of water.
It could also be really good to use different berries such as blackberries, blueberries or even raspberries. It could even be good with peaches, apples, pears. If you use a juicier fruit you will probably have to use less water as I said above.
It also works fine if you make it the night before and just store it in the oven or fridge overnight, it would probably be good cold, too.


This was a real hit. I was VERY pleased with it! Mom just got home from the store with four boxes of organic strawberries.... I'm totally making this for breakfast tomorrow! 

If you try this recipe let me know how it works for you and if you tried any other type of fruit what tweaks you might of made.
Hope you like it as much as we do! 

Love,
Hagen

Tuesday, June 25, 2013

Recipe~ Creamy Coconut Macaroons

Here is a taste-bud-popping recipe, as promised! 


-Creamy Coconut Macaroons-

1/2 cup butter, softened
2 Tbls cream cheese, softened
1/4 cup honey
4 eggs
1/2 tsp baking powder
3 Tbls coconut flour
1 cup Enjoy Life chocolate chips
2 Tbls coconut oil 

1. In a large bowl, cream together the butter, cream cheese and honey.
2. Add in the eggs, one at a time.
3. Sift together the coconut flour and baking powder, and stir in. Make sure you don't over mix!
4. Drop batter by tablespoon fulls onto a lightly greased pan and bake at 350* for 12- 15 minutes. While cookies are baking, put remaining batter in fridge. 
5. While cookies are baking, melt together the chocolate and oil in a double boiler.
6.  Let cookies cool in the fridge before dipping.
7. Dip cookies in chocolate one by one. Place the dipped cookies upside down on a sheet, and place in the freezer for ten minutes.
8. Enjoy! Store cookies in the fridge. Makes about 36 macaroons. 


The sun started melting the chocolate, as you can see. Being sun-kissed made them taste even better!
These macaroons are so simple, I think the best part is that they are gluten and sugar free. 

Hope you enjoy these as much as we do!
Bake on,
Layla


Wednesday, June 5, 2013

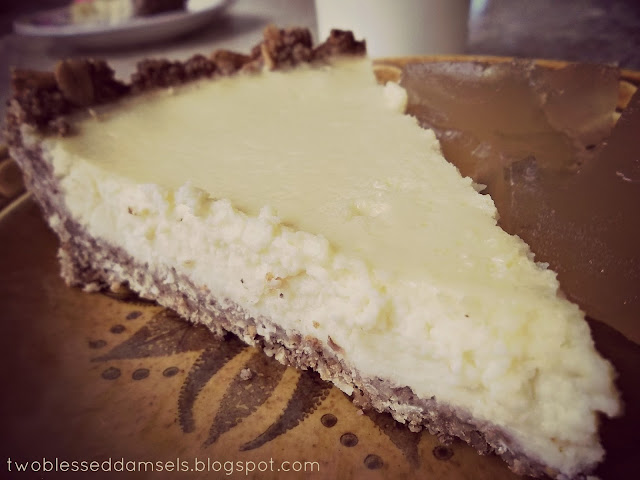
Recipe~ Honey Cheesecake

Another recipe on a Wednesday... maybe I should call this 'What She Ate Wednesday'!

Now this was a first for me. I love cheesecake, but for some reason I have always been a bit intimidated by making one from scratch. Let's just say there are rational and irrational fears. This one was certainly irrational! So, I faced my fear, and this was the result...


-What you need-

 For the crust
1 cup gluten-free oats
1/2 cup pecan (or almond) flour
4 Tbls butter, melted
1 Tbls honey  

For the filling
8oz package cream cheese, softened
1/2 cup ricotta cheese
1/3 cup honey
4 eggs

 -What to do-
1. Heat your oven (or toaster oven) to 350*
2. Put the oats in a blender or food processor, and blend for a few minutes.
3. Pour the blended oats, pecan flour, butter and honey into a 9 inch pan. Mix together, and press into the bottom and sides of the pan. 
4. Bake crust for 10 minutes.
5. While crust is baking, cream together the cream cheese and ricotta in a large mixing bowl.
6. Beat in the honey and eggs, one at a time.
7. Pour mixture into the pre-baked crust.
8. Bake for 30- 45 minutes, depending on how hot your oven runs.
9. Cake is done when the middle is firm to the touch.
10. Let cake cool in the fridge for at least 5 hours, but over night is better.


 Easy-peasy, huh? It was so delicious! I love the texture that the ricotta added, and the oat/pecan crust almost tasted like a graham cracker crust. What's even better is that I didn't have to use any sugar! I can confidently say that I am over this irrational fear!

 I was short on fruit for topping, so I served mine with homemade lime jello. If you try this recipe, I would love to hear what kind of topping you made!

Keep calm and Bake on!
Blessings,
Layla


Wednesday, May 22, 2013

Recipe~ Soaked Oatmeal

Hello! 
I honestly have to admit that I don't particularly like to pose and have my pictures taken... So we won't be doing a fashion post today (because of the lack of pictures). How about a recipe instead? 

Here's a yummy and easy breakfast recipe that doesn't involve much prepping, and is great if you want a quick, healthy breakfast. It only takes about 10 minutes to cook!


What You Need:
2 cups oats
4 cups water
3 apples, peeled and chopped
3 tsp cinnamon, separated
1/2 tsp nutmeg
1/2 tsp powdered ginger 
butter
honey
    
 What To Do:
1. The night before, pour 2 cups of oats in a large bowl and cover with water. Cover bowl with a towel and let sit over night. In the morning, drain and rinse your soaked oats.
2. Bring the 4 cups of water to a boil and add in the oats.
3. Bring oats down to a simmer, and let cook for about 7 minutes, or until they become the consistency you prefer. Mix in 2 tsp cinnamon.
4. While your oats are cooking, put your chopped apples in a small pan with a chunk of butter, remaining cinnamon, nutmeg and ginger. 
5. Put a lid over the apples and let them simmer for a few minutes, until they are soft and bubbly.
6. To serve, top the oatmeal with a chunk of butter, a scoop of apples, and a drizzle of honey.


Can you see all that melted butter and honey? Yum!
I love oatmeal, do you? Mom has a hard time getting it down, so I try to spice it up for her!

I hope you enjoy this recipe. I would love to know if you tried it, or what kind of variation you did! 

Have a good night!
 <3 Layla 

Friday, April 26, 2013

Chocolate Birthday Cake

Hey y'all!
Last weekend, Mom became another year wiser. That's right, it was her birthday! Our aunt came down, spent the weekend with us and took Mom shopping. Of course we made her presents and cake, chocolate cake!
 
Here is an adorable paper frame Hagen made. I love the little RV!
 

And here is a little video of us singing 'Happy Birthday', and Mom blowing out her "candle"....


We had an enjoyable weekend celebration!
And now onto the cake...
 

I have a confession to make about this cake... it was made from a mix... go ahead, ridicule me...

Are you done? Okay, well this mix is our favorite to use whenever we are short on ingredients and time. It is gluten and soy free, and we only use it occasionally. 

For the cake you will need:
3 eggs
1/2 cup oil
1 cup strong coffee
 1/2 cup water

Mix together the above ingredients and pour into greased cake pans. Bake at 350* for 25- 30 minutes. This mix makes two 8-inch round cakes or 24 cupcakes.

For the ganache you will need: 
  1 10 oz bag of Enjoy Life Mini Chocolate Chips 
2 Tablespoons cream cheese
1/4 to 1/2 cup milk, or heavy cream
    
Put these ingredients into a saucepan or double boiler on low heat. Stir until you have a nice liquid. I started out with 1/4 cup of milk, then slowly added more to get the consistency I wanted. You may have to add more liquid, depending on if you use milk or cream.

When your cake is cooled, pour the ganache over the top. I like to do a small amount at a time, letting it soak in and spread out. 


When it comes to chocolate, I'm a pushover...
I hope you enjoyed this not-so-made-from-scratch recipe!
Blessings,
Layla

Sunday, April 14, 2013

Recipe: Lime-Orange Jello

Spring is here in Texas! We had a lot of rain last week, and now there are flowers popping up everywhere. I know Hagen is happy, she loves taking pictures of flowers! 

With the mild heat, we needed a nice treat to cool us off. I was short on ingredients, so went searching on the internet... I came across Whole New Mom's recipe for homemade jello. 
Here's my version...

What you need:
4 Tbsp gelatin
1/4 cup raw sugar
1 1/2 cups boiling water
3 cups cold water, divided
Juice from 4 limes 
Juice from 1 orange
1/2 tsp orange extract
1/2 tsp grated lime rind

1. Put gelatin in a large bowl, pour in 1 1/2 cups cold water. Allow gelatin to soften while water is boiling.
2. Add boiling water to gelatin, and stir until dissolved.
3. Add the remaining ingredients, including the other 1 1/2 cups cold water.
4. Pour into 13x9 pan.
5. Refrigerate until set, about 5 hours.
Enjoy!

I would like to try this recipe again, using honey as a sweetener. 

My younger siblings had never eaten Jell-O, it being full of sugar and who knows what! When I put a bowl of this homemade jello in front of them, they didn't know what to do with it!

    Do you like jello? If so, what is your favorite flavor?

Blessings,
Layla 


Monday, April 8, 2013

Recipe~ Orange Chocolate Chip Cookies


It has been a while since I've posted a recipe. Actually, it has been a while since I've been able to bake. I have been trying to get used to the tiny oven in our tiny house. I think these Orange Chocolate Chip Cookies are worthy to post!


Orange Chocolate Chip Cookies

1/2 cup coconut oil, melted
1/4 cup honey
1/2 cup orange juice
4 eggs, room temperature is best
1 teaspoon vanilla or orange extract
1/2 cup Enjoy Life chocolate chips
1 cup coconut flour
1/2 cup pecan (or almond) flour
1/2 teaspoon baking soda 

1. Pre-heat oven to 350* 
2. Foil cookie sheets and grease with coconut oi
3. In a large bowl, mix together the first 6 ingredients 
4. In a small bowl, stir together the flours and baking soda 
5. Mix dry ingredients into the wet
6. Allow batter to sit for a few minutes, letting the coconut flour soak up the liquid
7. Drop cookies by tablespoon on the cookie sheets
8. Bake for 10- 15 minutes
9. Let cookies cool a bit before removing from pan
10. They taste even better when they have been refrigerated over night!
    
 
Since my oven is so small and doesn't radiate heat too well, I had to set the heat higher. You might want to try 325* first, depending on your oven.

It has been fun experimenting in the RV. I hope to add more RV recipes in the future!

 Chocolate and orange are one of my favorite combinations! What's your favorite chocolate combo? 

Blessings,
Layla 


Sunday, February 10, 2013

Recipe: Grain- Free Zucchini Muffins

Today I tried something new, something I have been reluctant to try for quite some time...
Zucchini Bread

Actually, Zucchini Muffins. They turned out to be a hit! I found the recipe from The Roasted Root,
it was a guest post from Seaweed & Sassafras.
Her recipe called for almond flour and Greek yogurt,  but I had to use pecan flour and keifer. The were DELISH! Okay, time for the recipe...


Grain- Free Zucchini Muffins
Makes one dozen

1/2 cup raw sugar
3 eggs
3/4 cup + 1 Tbsp keifer
1 1/2 cup shredded zucchini
1 tsp cinnamon
1/2 tsp powdered ginger
1/4 tsp nutmeg
1 1/2 cup pecan flour (or almond) 
1/2 cup coconut flour
1 tsp baking powder

Topping:
1/4 cup chopped almonds
1 Tbsp raw sugar
1 tsp cinnamon  

1. Heat oven to 325*
2. Place muffin cups in muffin tin.
3. In a bowl, wisk together first 3 ingredients until sugar is dissolved.
4. Add zucchini and spices to the wet ingredients.
5. In a large bowl, mix together your flours and baking soda.
6. Add wet ingredients to the dry, mixing until incorporated.
7. Divide batter into muffin tin evenly.
8. Sprinkle on almond topping.
9. Bake for 30- 35 minutes.
10. Enjoy!   
   
Aren't these muffin cups darling? I got them for my birthday from some very special friends...
(you know who you are)


 Now grab your favorite thermos, fill it with some herbal tea, and enjoy yourself!

I hope you are having a wonderful Sunday!
Blessings,
Layla